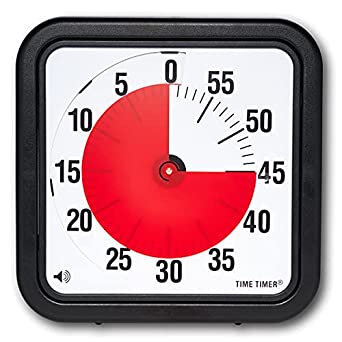
At the start of the year, most teachers start small with writing workshop. After a brief minilesson, you can set a timer for 5-10 minutes (or any amount of time you’re confident will be a success) and announce to your class, “Let’s make our goal today ____ minutes!” Then, make sure the timer goes off while writing is still going strong. Do this day after day, making sure the timer goes off while kids are still drawing and writing, and soon, you’ll be able to add a minute, two minutes, five minutes.
Slowly, slowly you’ll continue this, building up the amount of time, and increasing writing stamina a few minutes at a time. Before you know it, your kids will be drawing and writing for 15, 20, 25 minutes or more. In some classrooms, the kids would write all day if they could.
But sometimes, especially after a long weekend or a vacation, you’ll have to readjust for your whole class, starting all over again, or close to it. And that’s okay. Sometimes writing workshop will be an entire hour, sometimes only twenty minutes. It will look different for various age groups, experience levels, and at different times of the year. Better to have a short, very successful writing time where all kids are engaged, then a long, drawn out writing time where kids are not engaged at all.
But what to do when some kids could write all day, while others are at the 5-10 minute mark? This will almost always be the case – kids are all different, after all.
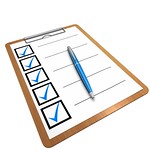
One solution is to set kids up with a to-do checklist (some call this a “task completion checklist”) that gives kids a clear list of tasks that they can complete during writing time. Often kids can stay engaged longer if the time is broken up into smaller chunks. These checklists can be individualized to a student’s interests or particular writing goals. For example, in first grade (you’ll need to create picture clues for each item):
- Reread your writing so far
- Draw one new drawing that shows something that happened
- Write three sentences to go with the drawing
- Add color to your drawing
- Read your writing aloud to your partner
- Listen to your partner read their writing
Notice these tasks can be done in order, or out of order, and parts of the checklist can be repeated again and again. The goal here is engagement, so providing a student with many options that are within reach is important. Additionally, keeping each option closely related to independent writing is key. Notice none of the tasks are unrelated to writing workshop (like filling out a spelling worksheet, or playing a math game on the computer). This way every student is participating in writing workshop – with a range of entry points.
Here’s another, different, first grade example, adjusted for student interests and needs. You’ll need to create picture clues for each item, of course:
- Reread your story so far
- Draw one picture for each part of your story on each page
- Add more detail to each picture
- Label yourself in each of your pictures
- Label the other characters in each of your pictures
- Label three more things that are not characters
- Tell your story aloud to your partner, using the pictures to remember
- Listen to your partner read or tell their story
Notice the difference between the two checklists. The first checklist is for a student who is ready to write sentences with each picture, while the second is appropriate for a student who needs to take time writing one word at a time. Both checklists provide plenty of options for an extended amount of time, while still allowing for flexibility in the order of each task, and the amount of time spent on each task
Here’s another option, for a student who is writing more conventionally, or an older student. Again, you’ll need to create picture clues if the student needs support with reading:
- Work on your drawings for ten minutes
- Write sentences to go with your drawings for ten minutes
- Read your writing to your partner for five minutes
- Listen to your partner read their story for five minutes
These checklists would be introduced in an individual conference or a small group, and once introduced, they become a simple tool to use for checking in with students in quick, on the fly conferences – the kind of writing conference that only takes two minutes.
| T: “How’s it going today? Which part of your checklist are you working on?” | RESEARCH/ASSESS This question opens the conversation and allows you to assess the work the child is doing, without assuming. Notice it may have nothing to do with the particular minilesson that day. It is individualized to the student’s personal goal rather than the whole class work. |
| S: (Points to checklist) “I’m working on writing sentences to go with my drawing.” | Notice the student knows to answer with the strategy they are using, rather than the specific topic [“writing about dogs;” ‘the time I went to the park,” etc.]. |
| T: “That’s going to help readers know what’s happening in your pictures! Great work! What are you going to do next?” | COMPLIMENT/REINFORCE Notice the compliment reinforces a strategy and the reason for doing the strategy. |
| S: Points to an item on the checklist. “I’m going to read my work to my partner.” | Notice the student has a plan for next steps now, and knows how to use the tool. If not, this would be a great opportunity for coaching the student. |
| T: Great! Let me pretend to be your partner so you can practice how to ask them if they are ready for you to read to them. | TEACH/COACH JUST ONE THING Every conference has one teaching point, and am opportunity for the student to practice or try out the strategy. |
| S:“Excuse me. Could I read my story to you now?”T: “Of course! I’m ready for you to read to me.” | If you haven’t taught whole class lessons about partner work, you’ll need to do more coaching here. Most writing workshop units of study include lots of whole class minilessons and reminders on how to work with a partner. |
| T: “Looks like you are ready to keep using your checklist every day! I can’t wait to read more of what you’ve written. Also, remember that you can use the charts from the minilessons too. They are right up there for you to see. I can already see that you’re doing what we talked about today – matching your sentences to your pictures on each page.” | LINK TO ONGOING WORK The link portion of a conference is where you reinforce the student’s future plans, as well connect the individual work they are doing to the whole class work or past lessons that have been introduced. |
Building up students’ stamina for drawing, writing, and telling stories, is arguably the biggest priority in writing workshop. If students aren’t writing, then then how can it be called “writing” workshop, honestly? The amount of time students spend is up to you – whether it’s how much time to plan on for your whole class, or whether it’s making individual stamina goals for certain students. These checklists aren’t for every kid – if your each student in class is in need of a checklist to break the writing time up, you may want to simply shorten your writing workshop, or give whole class reminders to switch from one writing workshop task to the next.
How are you building up students’ stamina all year long? Share your thoughts in the comments!
Discover more from TWO WRITING TEACHERS
Subscribe to get the latest posts sent to your email.


Great post. Love the reminder that disruptions can cause a loss of stamina at any point. It’s not just the long holiday breaks.
LikeLike