T oo often we find ourselves in the midst of workshop without the right tool!
Hasn’t this happened to you?
Trying to be proactive can help your conferring not only become more efficient but richer as well. Let me unpack my conferring toolkit for you and give you a peek at what my “must haves” are when I confer.
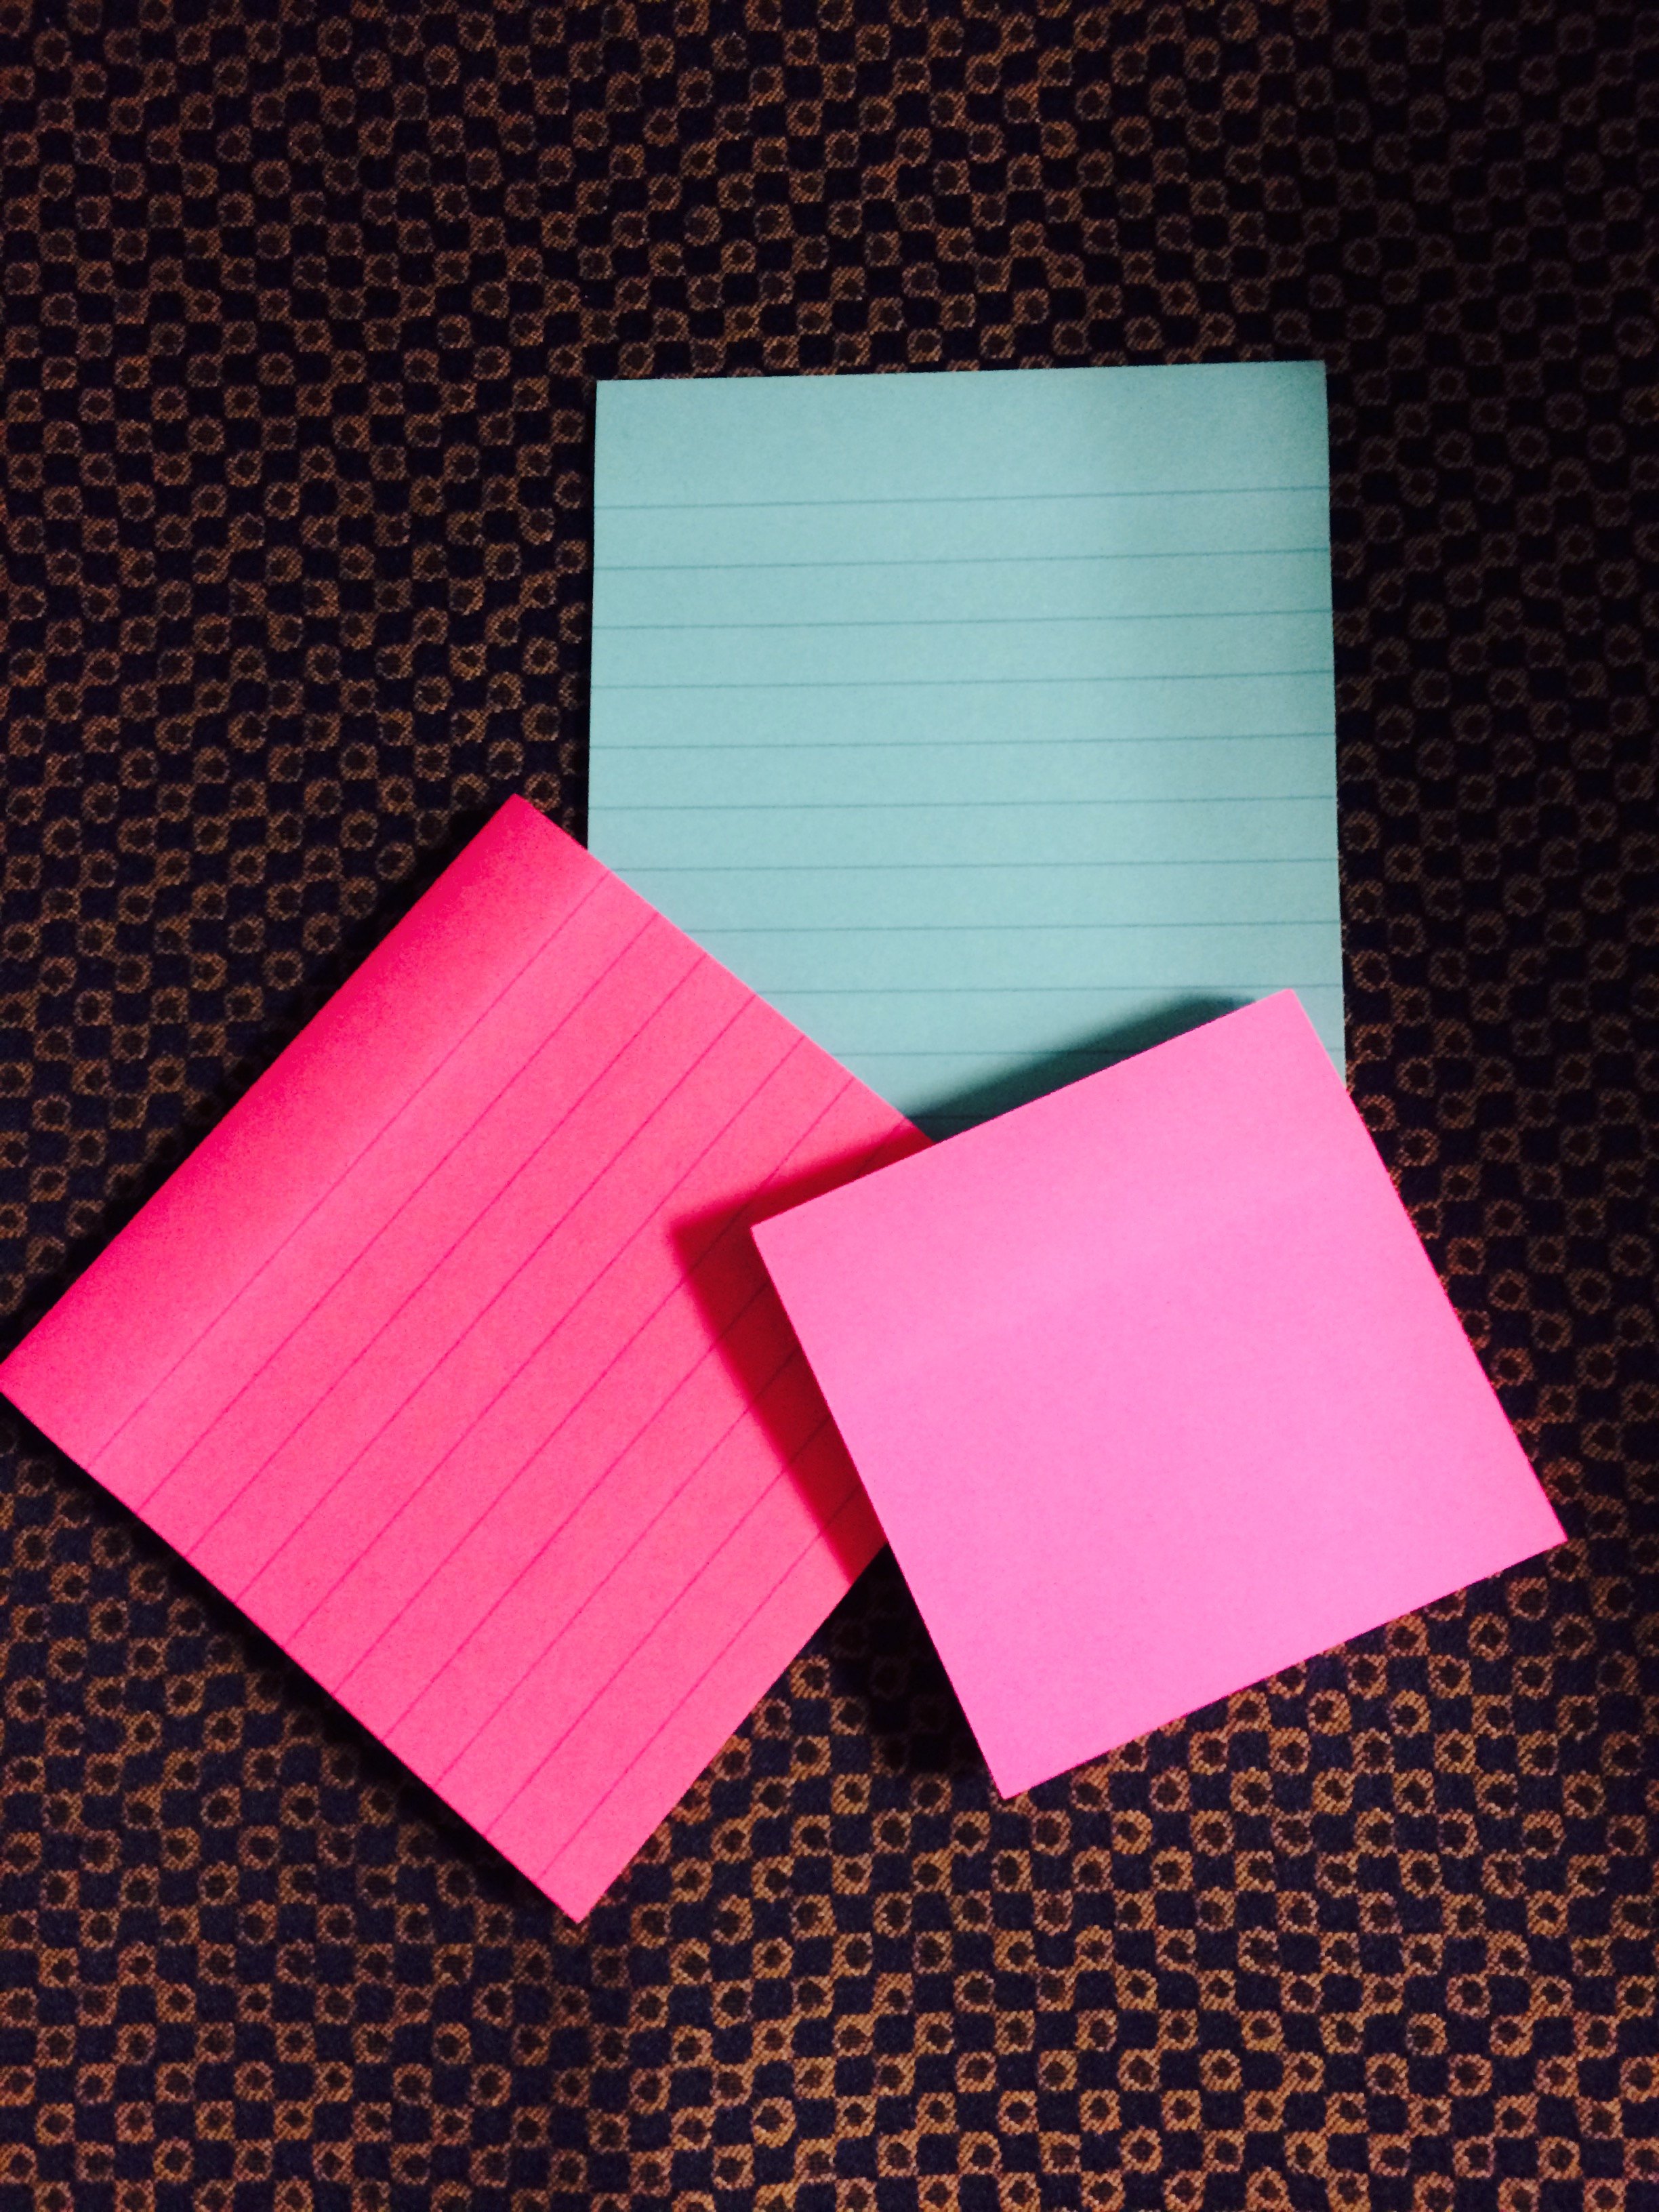
STICKY NOTES! I think it is a requirement to have dozens of shapes, sizes and colors when you are a teacher, but they are a definite must while conferring! For younger students you might script their story for you, the teacher, to refer to later. You can offer support on a sticky note creating a small visual for the student to use when you are not right next to them. This might be a small picture that helps them remember their topic or a drawing/word that keeps them on task. I’ve even created a personalized mini-chart for students that is specific to the strategies they are working on to help support their writing.
PENS! I need multiple colors for students to make on the spot revisions to their work when they notice something they missed. I also always have an extra Flair Pen handy. If you want more information about the benefits of using pens vs. pencils, here is a post from Elizabeth that makes a great case.
TAPE, PAPER, GLUE AND SCISSORS! Have you ever had a student write to the bottom of the paper and then up the side because she ran out of room or pages? Having extra sheets of paper to attach or a strip of paper on hand to glue or tape at the bottom of a page helps remind students of the directionality of print. Students often know this already, but in their haste to get their words down they go up the page instead of turning to the next or getting another sheet of paper. Having these supplies on hand during the conference to problem solve this situation is helpful and spares you precious minutes you would spend walking across the room to get more paper.
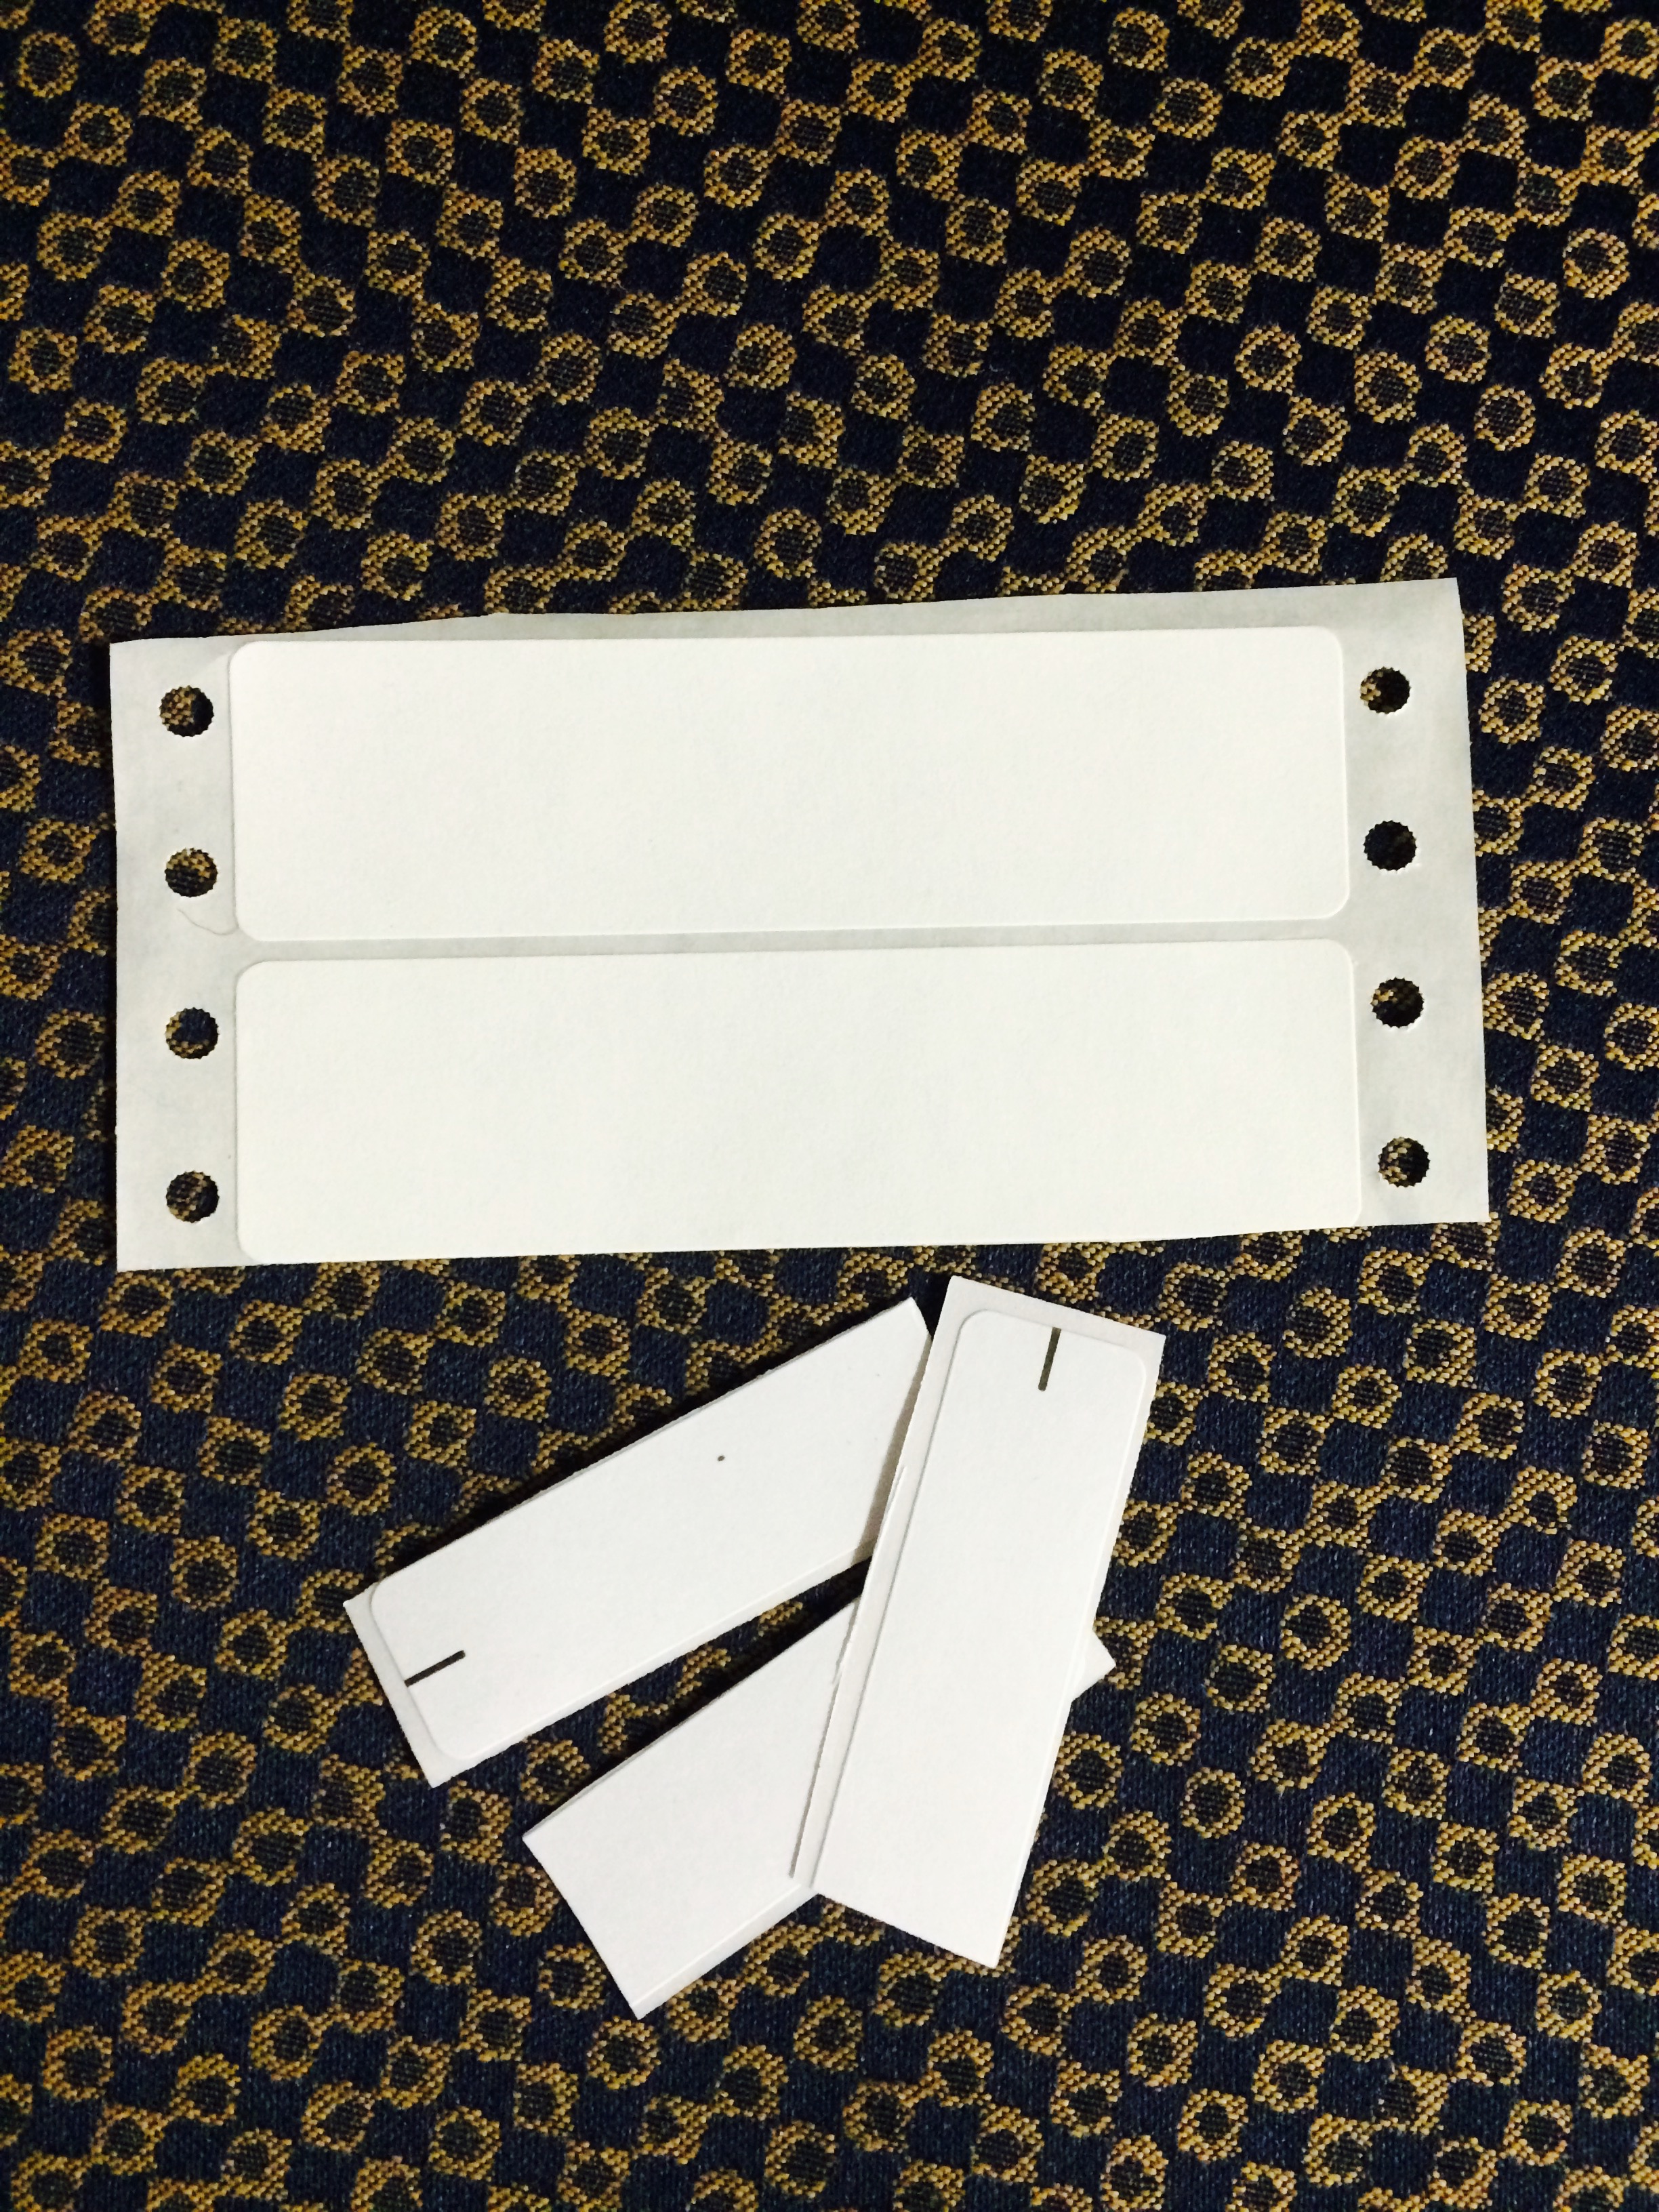
COVER-UPS! Also known as labels or white out tape. I use these when students are ready to publish or when there is a major revision taking place that leaves no other alternative. I don’t make these available to students like I would extra paper and colored pencils, I keep these in my kit. Why? I don’t want students covering everything up before I get a peek at their work. I want to know what they feel needs to be covered. Having these available in my kit can ease some anxiety when a student feels they have made a mistake on their illustration or misspelled a commonly used word on their published pieces.
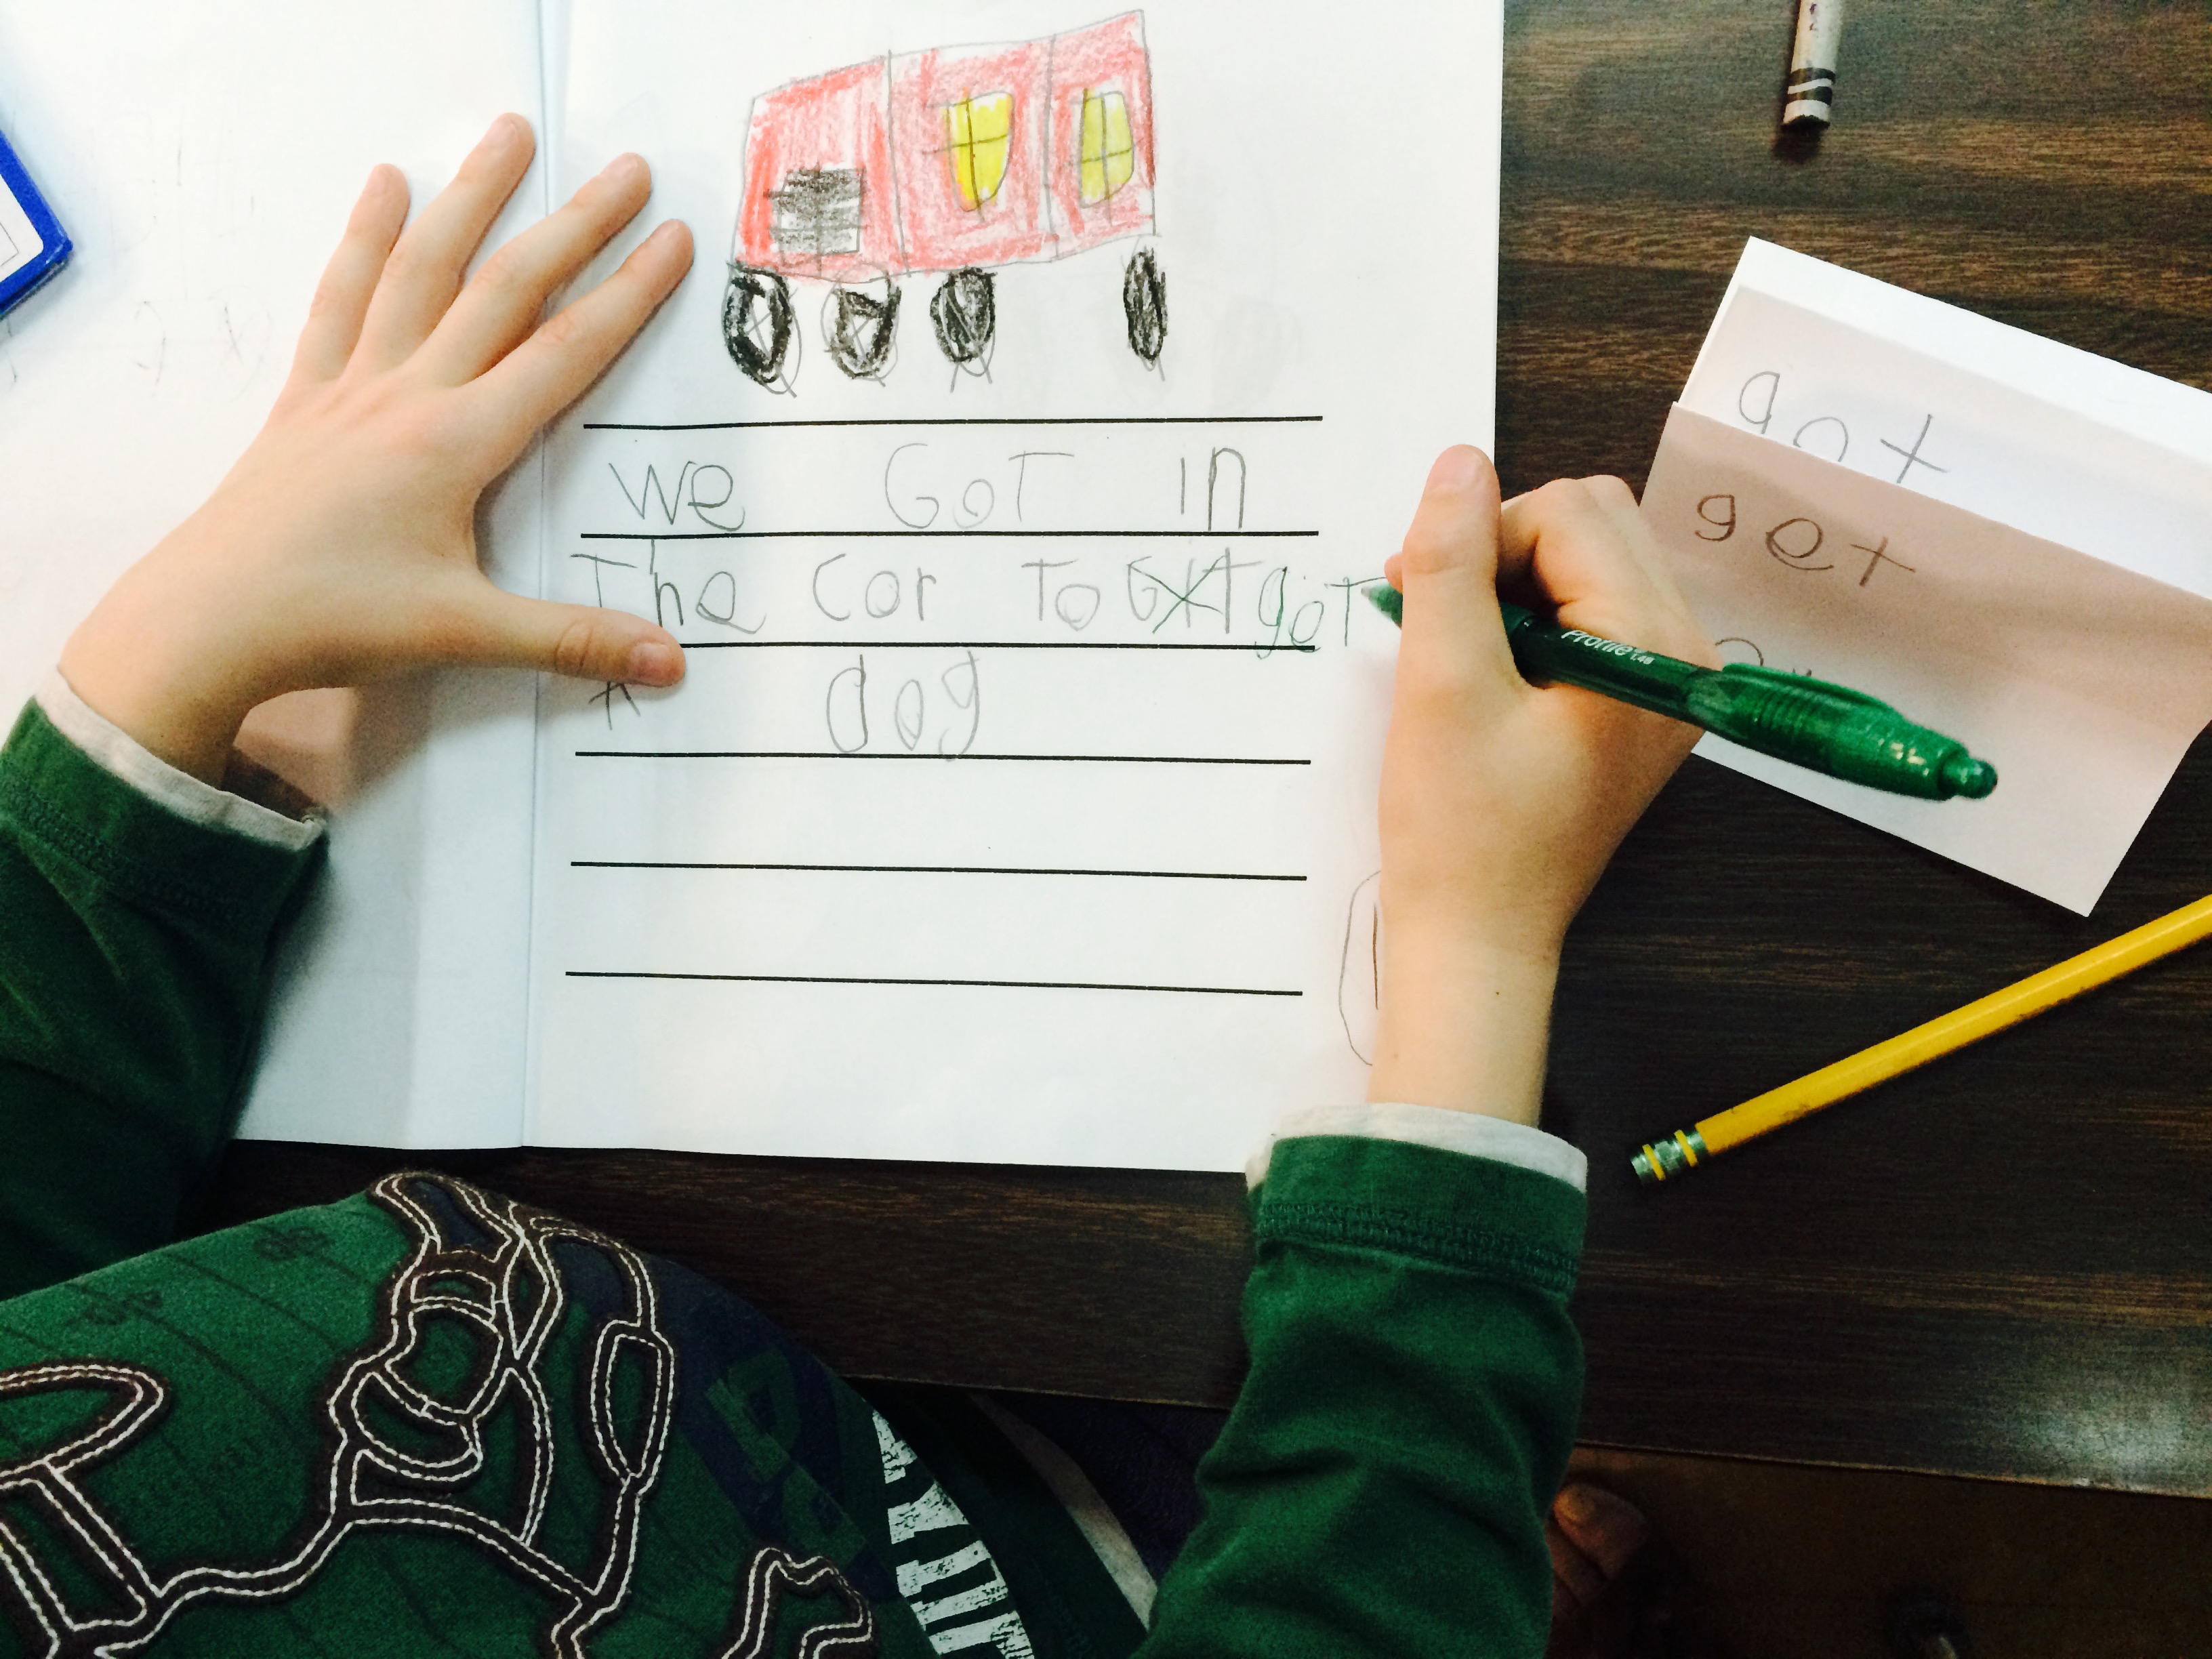
QUICK-FIX SPELLING! This is just an ordinary strip of paper folded like a fan. I keep these handy during a conference when I notice a commonly used word misspelled over and over again in a student’s writing. For instance, Josh (below) was really close to spelling the word “get,” but continually through one story had it spelled, “git.” Understandable for a six-year old. However, it was clear to me that he was ready to learn how to spell this word based on his close approximation. This led to an opportunity to share the spelling of the word, allowed him to practice it multiple times and then he went back into his piece like a detective to edit this word throughout the story.
Some other items I stash in my kit are of course a stapler, staples, highlighters, a marker or two, colored pencils, some regular pencils and paper clips. This is my small caddy where I stash all these supplies. Notice, it’s not neat and organized, because really, it only looks that way the first time you use it. When you are really using your caddy of supplies it gets a little messy, so I thought I would show you how it really looks.

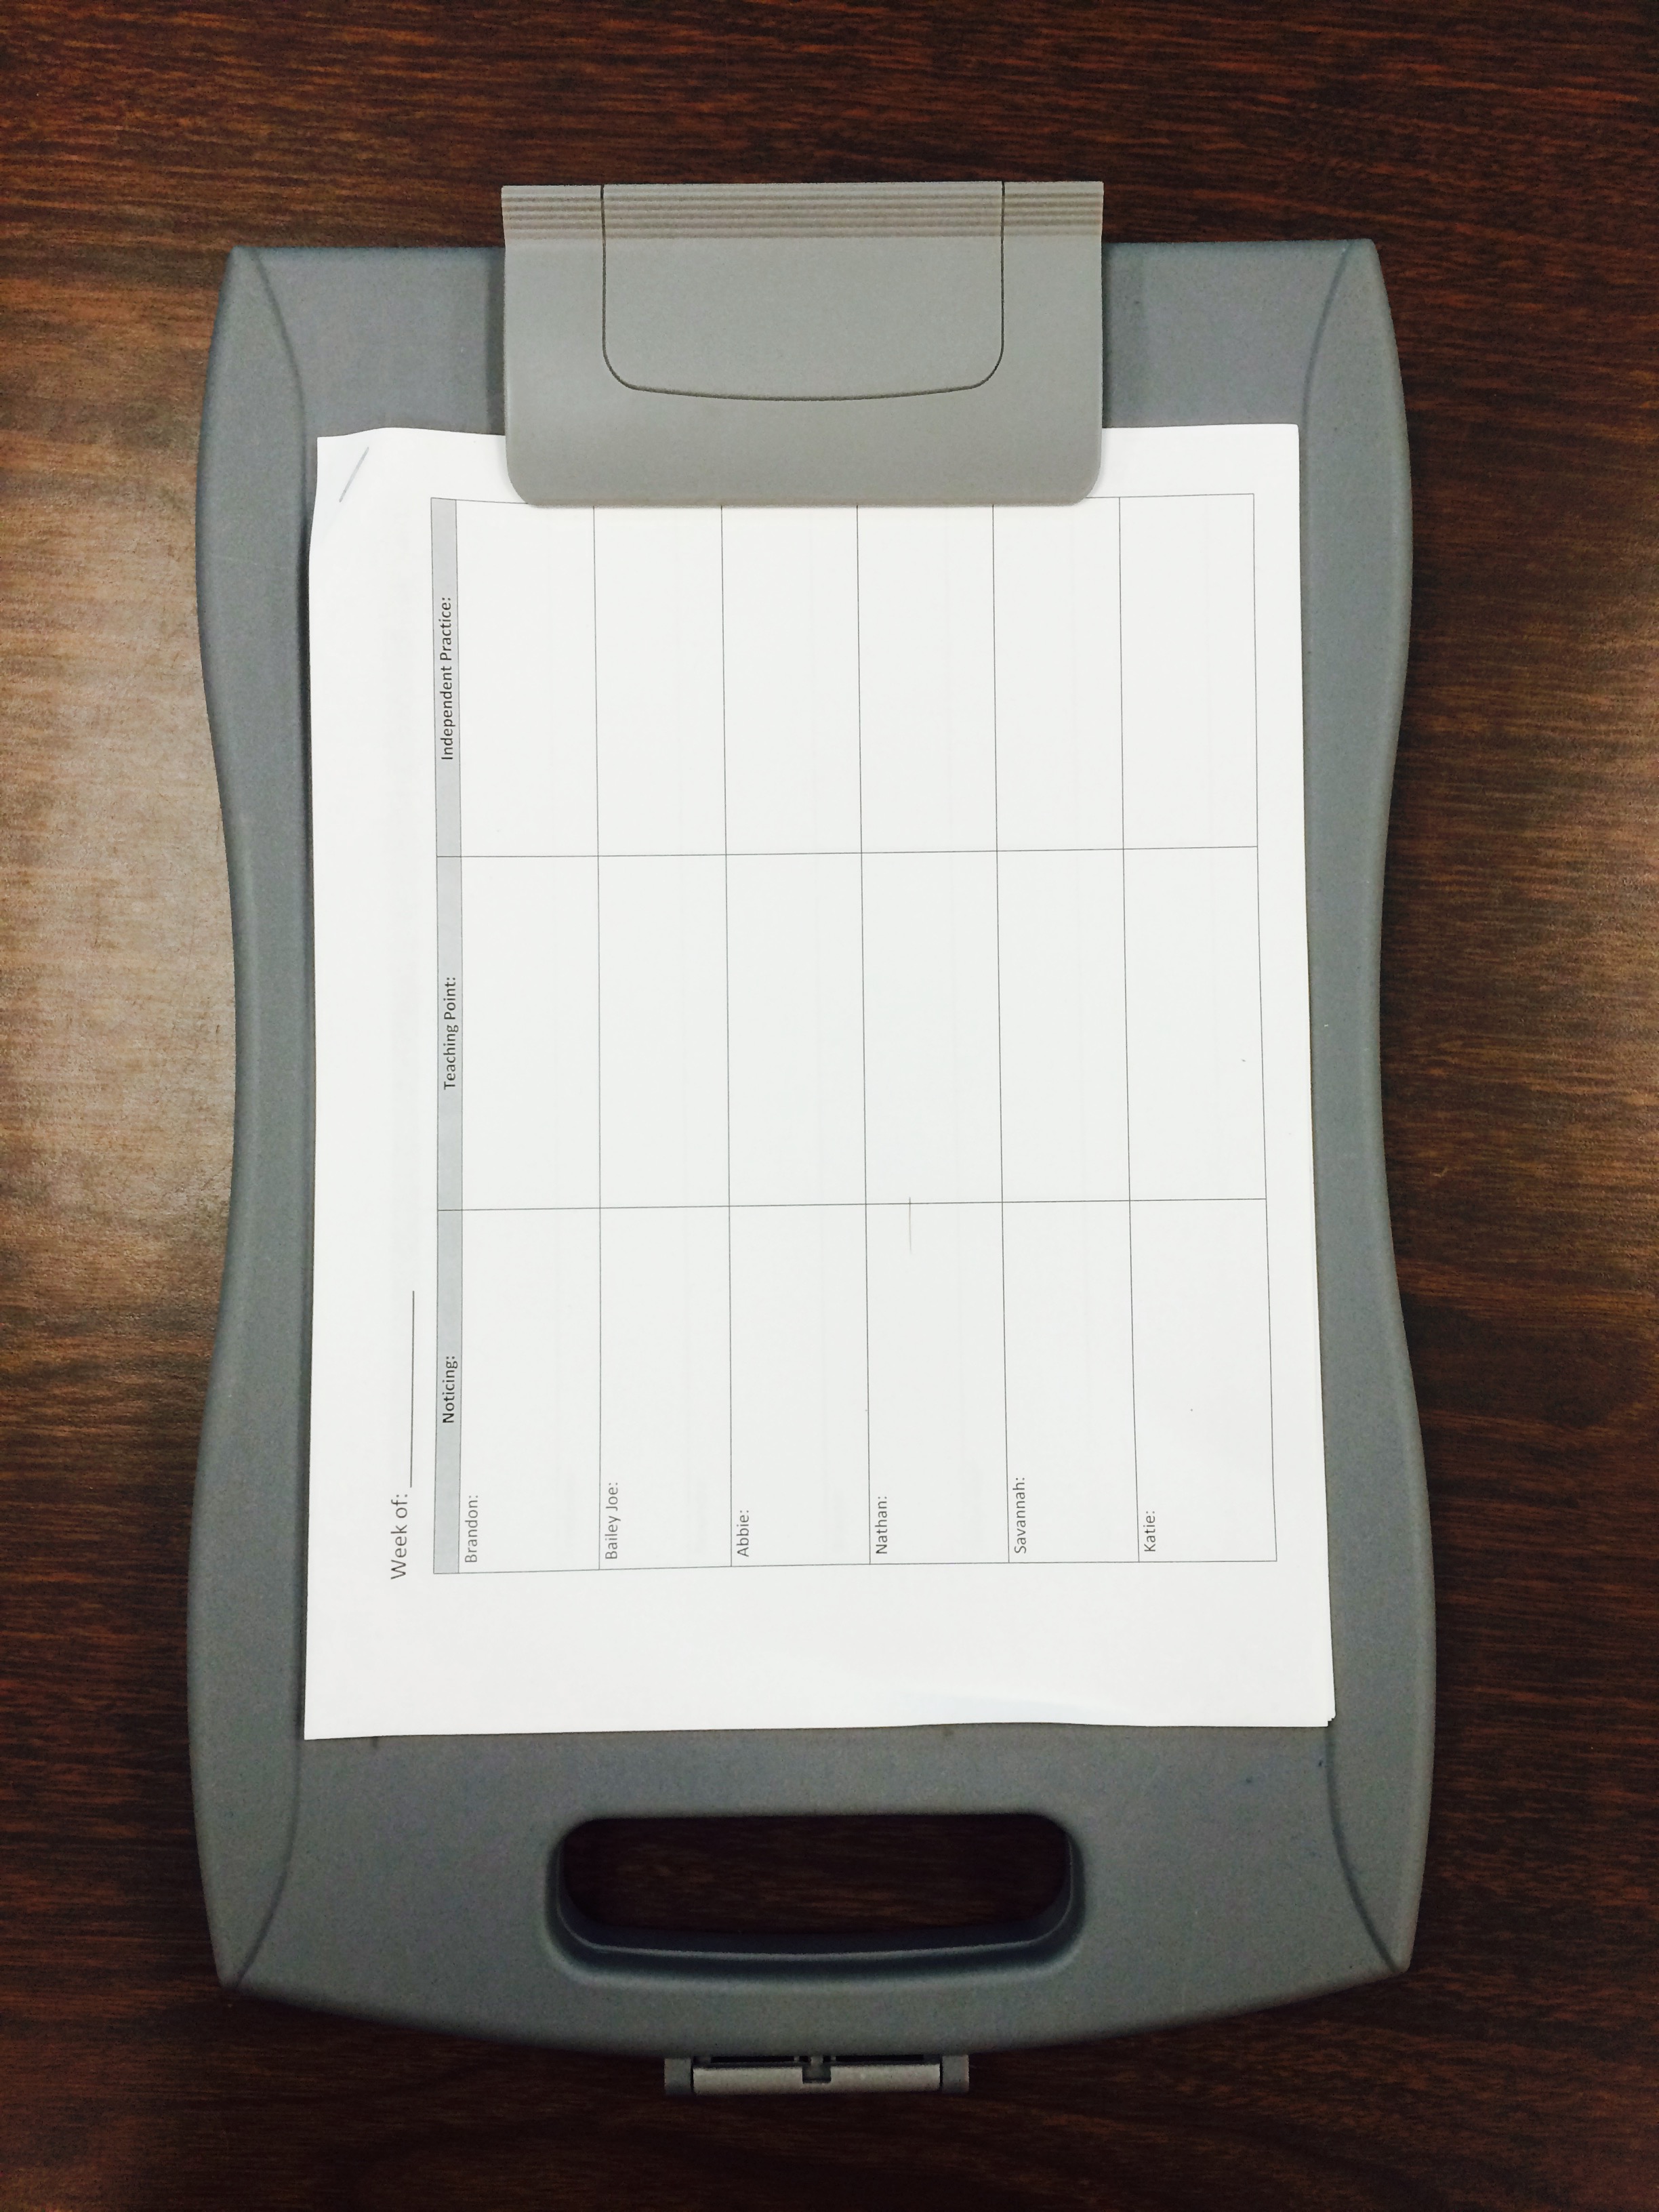
Then we have the second part to my kit. This is my clipboard. It is a clipboard with a compartment inside.
On the outside I clip both my monitoring form and my conferring forms where I record my conferences and take monitoring notes.
On the inside I am able to stash mentor texts, extra booklets, extra paper, a pen or two and extra forms in case I fill mine up. I also keep a few week’s worth of notes inside so I can refer back quickly when I am about to confer with a student. It allows me to catch myself up in case I need to refresh my memory of what I already taught an individual student. Mini charts and word walls allow for easy visibility for students who may not be in a convenient spot to refer to the classroom charts.


What’s in your toolkit? Let me know in the comments or during our Twitter Chat on Monday, May 11 8:30-9:30, using the hashtag #TWTBlog. We hope you’ll join us!

Discover more from TWO WRITING TEACHERS
Subscribe to get the latest posts sent to your email.


So many great ideas. Love the labels, the fan, and the holder you organize it all in. So many great ideas. Thank you for sharing!
LikeLike
Love this kit! I am going to make one. I need to find that clipboard with the storage compartment.
LikeLike
So many great ideas, Betsy!
The spelling fan – I had to actually do it! So that’s a “must do” plus the labels, and the “contractor clipboard” with the stash of papers! WOW! Thanks so much! ❤
LikeLike
Great post, Betsy! I never thought of the white labels. That’s genius!
I love your (messy) caddy! I need to get one of those to stick in my canvas tote bag when I go into schools. Everything is just thrown into my bag, which means sometimes sticky notes are bent, pens are at the bottom of the bag, etc.
LikeLike
I wish I had your toolkit while I was still teaching. I had most of the components, but as you said, they were scattered around the room. I had fewer students as an ESL teacher so access to the tools was not such a problem. I think the kids would like the toolkit as well and might even like to create “toolkits” of their own for writing and editing. Interesting piece!
LikeLike
I love the clipboard with a storage compartment! It’s something I’ve been meaning to get! I’m glad you reminded me of it!
LikeLike
I am really loving this blog series about conferring tool kits! WHERE did you get that clipboard with the storage compartment??? I must have that! I really liked the spelling fan idea. I wonder if it would work for third graders. I am guessing it would! Your toolkit is awesome.
LikeLike
I liked that spelling fan too. I think I’ll have to try that out tomorrow.
LikeLike